General Usage
How the Cells Plugin Works
The Cells plugin allows you to create pre-designed sections of content that can be placed anywhere on your website. Here’s how the process works:
- You create content within the plugin.
- The plugin generates a unique shortcode.
- You place that shortcode on the page where you want the content to appear.
- When the page loads, WordPress reads the shortcode and displays the content from the referenced cell.
If you need to update content, make those edits in the plugin where the content lives, not in the page that displays it.
If you delete a shortcode, the displayed content disappears from the page but the source content still exists in the plugin.
Checking if the Plugin Is Activated
Before you can create a Cell, make sure the plugin is active on your site. Log into your web site and look at the admin bar located across the top of a page. If you see a Cells link, then the plugin has already been activated.

Alternatively, you can look for a Cells link in the dashboard. If you see one, then the plugin has been activated.
Activating the Plugin
Only users with the Administrator role can activate plugins. If you don’t have this role, contact your site Administrator for assistance.
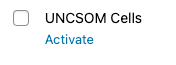
- From the dashboard or admin bar, select Plugins.
- Find UNCSOM Cells in the list of available plugins.
- Click the Activate link located under the plugin name.
Only enable plugins that your site actively uses. Unused plugins can slow your site and increase maintenance overhead.
Now you’re ready to familiarize yourself with our pre-assessment guidelines and start creating Cells.