Events
School of Medicine (SOM) websites use The Events Calendar Pro plugin to create and manage events.
This plugin allows you to:
- Create individual events
- Create recurring events
- Organize events into series
- Display events in multiple formats such as calendars or lists
Enable the Events Calendar Plugin
If ‘Events‘ isn’t an option in your Dashboard then you will need to activate some plugins before you can add events to your site.
- In your site’s dashboard, click on Plugins. Note: you must have administrator privileges to see this option. If you are not a site admin, you will need to ask your site admin to enable the plugins for you.
- Find and activate The Events Calendar plugin and then The Events Calendar Pro plugin.
Creating Events
When creating an event, you will see several fields that help define event details. Not all fields are required, but adding key information helps visitors understand the event and improves the quality of event listings.
- In the Dashboard, go to Events → Add New Event.
- Title – this should clearly describe the event. For example:
- Cardiology Grand Rounds
- Cancer Research Seminar
- Resident Orientation
- Event Description – this is where you can include:
- Information about the event
- Speaker information
- Agenda or schedule
- Registration instructions
- Use headings, paragraphs, and lists to make longer descriptions easier to read.
- Set the Time and Date.
- Recurring Event
- Allows you to create repeating events such as daily, weekly, monthly, or yearly.
- Many event details will remain the same for all recurring instances. Use Event Series instead if individual events need different details (such as location, time, or description).
- Easily remove specific dates from a series (for example, skipping a holiday).
- Related documentation from the plugin developer:
- Location
- Venue – identifies where the event takes place.
- The Show Map and Show Map Link – displays a map of the venue on the event page and includes a link to Google Maps. These options are checked by default. Be sure to uncheck them for virtual events or when a venue is not provided.
- Virtual Event
- Identifies the event as being virtual or hybrid and allows you to include a meeting link (such as Zoom or Teams).
- For detailed instructions, see the plugin developer’s documentation, Creating Virtual and Hybrid Events.
- Organizer – identifies the person, group, or department responsible for the event.
- Event Categories
- Categories allow you to group related events. They can be used to filter and display specific subsets of events.
- For example, creating and tagging events with a Grand Rounds category allows you to display only those events.
- View our Filter News and Events documentation for more information.
- Event Options – provides three settings that control event visibility and prominence.
- Hide From Event Listings – Prevents the event from appearing in the main calendar grid, list views, and widgets. The event remains live and accessible via its direct URL, which can be useful for private or invitation-only events.
- Sticky in Month View – Ensures the event appears at the top of the list within a day’s block in the Month View, which is helpful if a day has many events.
- Feature Event – This option marks an event to be styled differently or highlighted in certain displays to draw attention to it.
- Event Series
- Allow you to group related events under one umbrella, offering more flexibility than standard recurring events.
- Unlike recurring events, events within a series can have different venues, dates, times, and descriptions.
- Each series has its own landing page that displays all related events, making it useful for viewing a full schedule of related activities.
- Related documentation from the plugin developer:
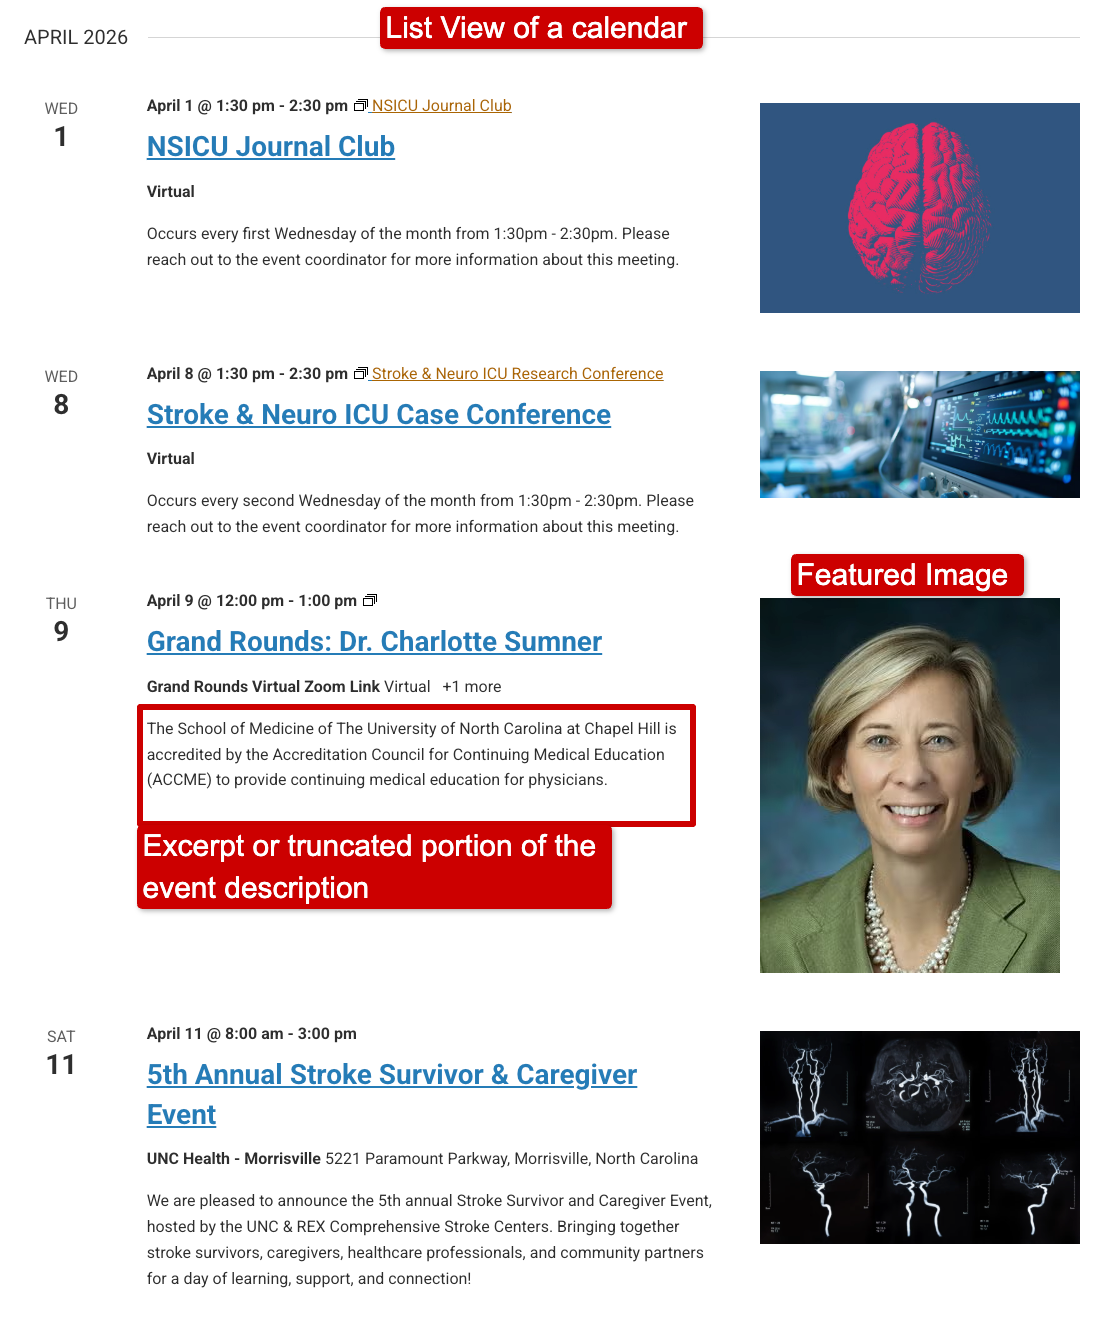
- Featured Image
- This image displays in calendar lists and in shortcode displays that include images.
- This image automatically displays near the top of the event page, above the event description.
- Excerpt
- Should be a short summary of the event.
- The excerpt does not display on the event page itself. Instead, it appears as the event description in searches, event listings and other displays that summarize events.
- If no excerpt is provided, the beginning of the event description will display instead.
- Since many event descriptions begin with details that don’t clearly summarize the event, writing a custom excerpt helps ensure visitors quickly understand what the event is about when browsing event listings.
- Publish the event.
- Click the View Event link across the top of the edit screen to confirm that all information appears correctly.

Event Images
Featured Image
Many event displays use the Featured Image, but editors often overlook this field.
The Featured Image:
- Appears in event listings and shortcode displays that include images
- Automatically displays on the event page above the event description
Adding a Featured Image is strongly recommended whenever an appropriate image is available.

Other Images
Additional images can also be added within the Event Description.
As with all images on SOM websites, remember to include meaningful alt text so the image is accessible to screen reader users.
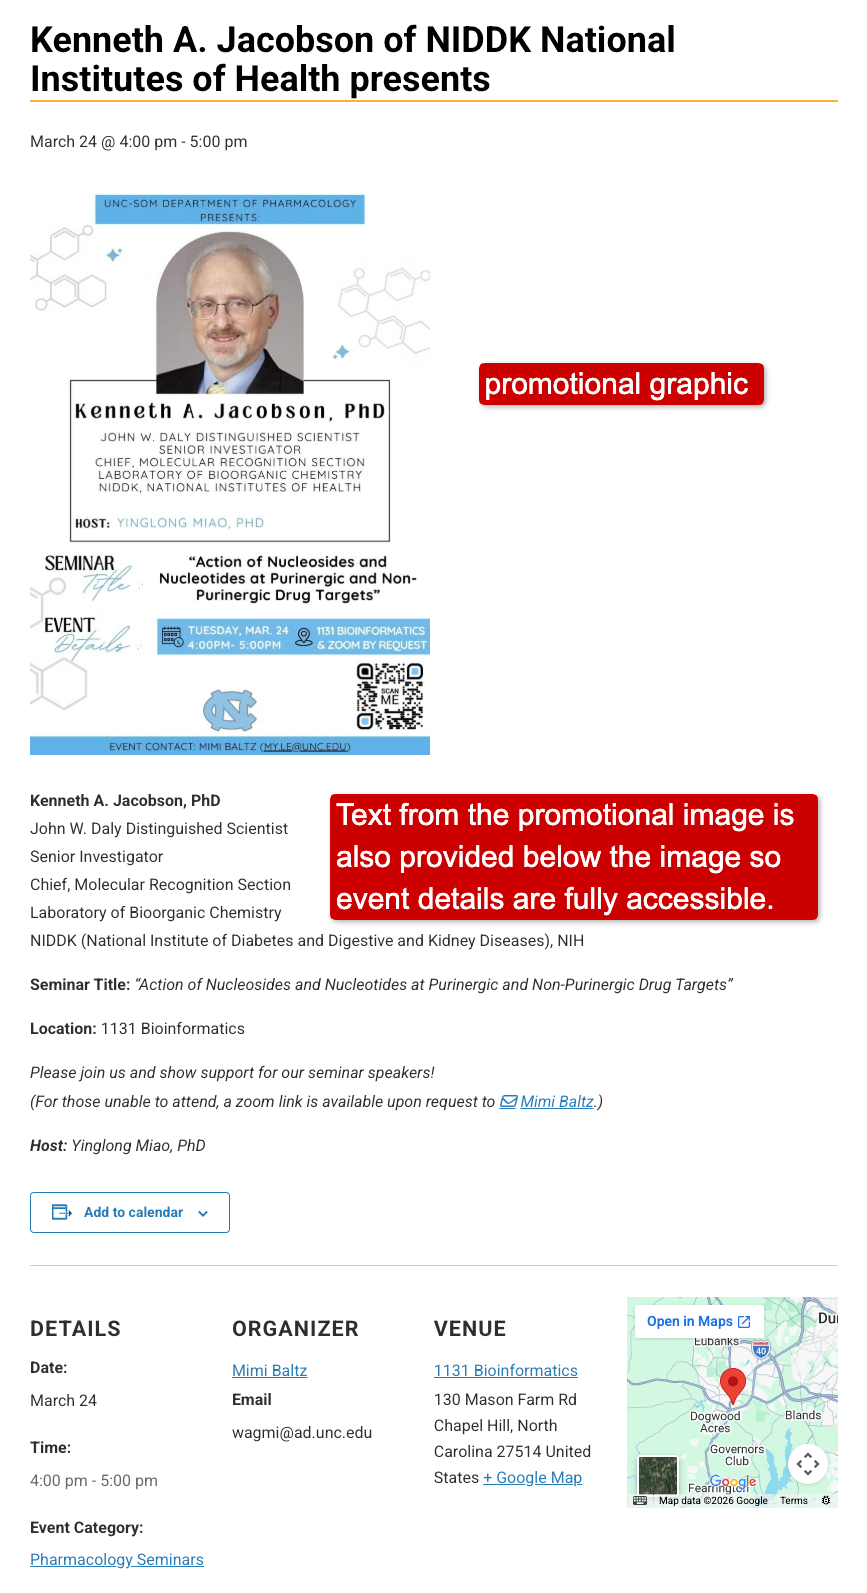
Images Containing Text
We’ve noticed that some sites post a text-heavy promotional graphics or posters as the only content in the event description. This creates significant accessibility problems.
Text inside images:
- Cannot be read by screen readers
- Cannot be translated by assistive technologies
- Is not indexed by search engines
- Often becomes blurry or distorted when resized on different devices
If you use a poster or graphic that contains a lot of text, the full text must also be provided within the page content, placed directly below or near the image.
The image’s alt text should briefly describe what the image represents and tell users where the full information can be found in the page content.
For more guidance, review the Complex Images documentation.
Finding and Editing Existing Events
In the Dashboard, click Events to view a list of all events on a site.
If you wish to edit an event, locate it in the list and click the event title to open it in the editor.
You can also edit content directly from the front end of your site. View our How to Edit Content documentation for a video showing both front-end and dashboard editing.
Tutorials From the Plugin Developer
The documentation below from the plugin developer provides detailed instructions for common tasks.
Note: our theme uses the Classic editor, not the Block editor.
- How to Create an Event
- Creating a Recurring Event
- Creating an Event Series
- The Difference Between Event Series and Recurring Events