Use Division To Display a Subset of Profiles
Divisions allow you to display a subset of profiles. This is key if you plan to organize or display people by role, program, graduation year, etc.
How to Create Divisions
There are two places where new divisions can be created:
On the Divisions Page
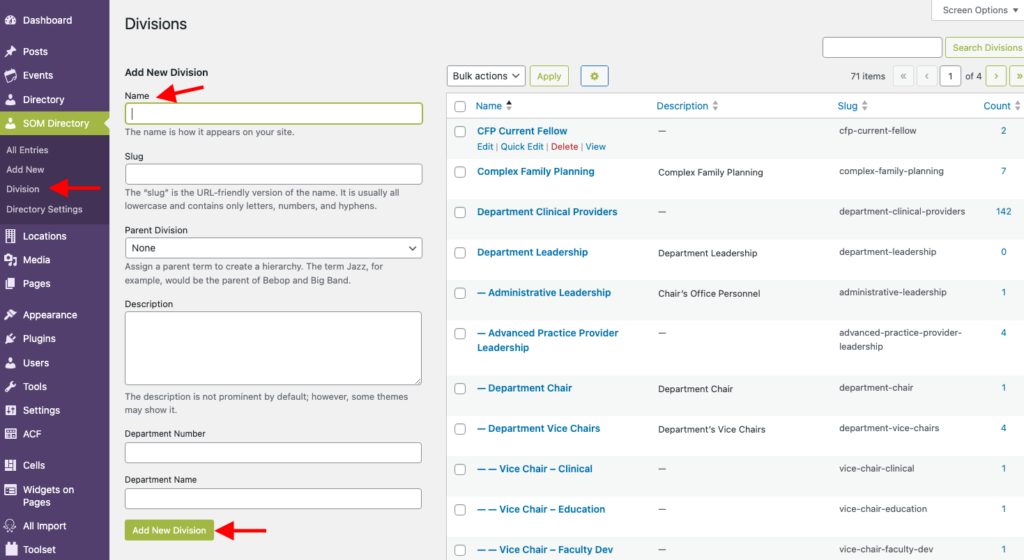
- select SOM Directory > Division in the dashboard menu.
- Under the Add New Division heading, add a name to the Name field.
- Click the green, Add New Division button.
While Editing a Profile
- Go to the right sidebar widget called Divisions.
- Click + Add New Division and enter the name of the division you wish to create.
Assigning a Division To a Profile
Once you’ve created a division, it will show up as an option on all profiles (you must be editing the profile to see these options). Look in the right sidebar for Divisions.
Multiple division can be assigned to a profile by checking the corresponding boxes.
Editing and Deleting Divisions
To edit or delete existing divisions, select SOM Directory > Division in the dashboard menu.
Then select the division you wish to edit or delete.
Deleting a division will not delete any profiles; it will just remove that division from any profile to which it had been assigned.
How To Create a Gallery For a Specific Division
View our Create a Gallery documentation to learn how to create a gallery with only profiles assigned a specific Division.

