Gravity Forms
UNC’s Gravity Forms Retention Policy takes effect January 1, 2026. Entries older than 90 days will be deleted beginning March 31, 2026.
Gravity Forms is a WordPress plugin used directly within your School of Medicine website. It’s great for building simple forms like contact forms, basic event RSVPs, or general sign-ups. It’s user-friendly and styled to match your site, but it should not be used to collect any sensitive or confidential information. Never use Gravity Forms to collect health information, student IDs, or any sensitive data.
If you use Gravity Forms, we strongly recommend posting a disclaimer that sensitive information should not be submitted through the form. You must frequently review uploads and notify ISO if there is accidental exposure of sensitive information.
We recommend using Qualtrics if a file upload field is added to the form. There have been issues where sensitive data has inadvertently been uploaded.
Retention Policy
Effective January 1, 2026, UNC’s Gravity Forms Retention Policy will take effect.
As part of this policy, all form entries and uploaded files older than 90 days will be automatically deleted beginning March 31, 2026.
This policy was created to:
- Improve overall site performance and reduce storage use
- Enhance data security and privacy
- Align with University data governance standards
What This Means for Site Editors
- The system will automatically delete all Gravity Forms entries and uploaded files after 90 days.
- Deleted entries and files cannot be recovered.
- You must manually export any form entries you need before the 90-day deadline.
For full details, view the Gravity Forms: Retention Policy and Mandatory Standards.
Best Practices
Following these best practices helps keep your forms secure, accessible, and compliant with the University’s data retention policy.
- Add CAPTCHA – Always include a CAPTCHA field to help prevent spam submissions from automated bots.
- Enable Honeypot – In your form settings, enable the Honeypot option. This adds an invisible field that traps spam bots without affecting user experience.
- Limit File Upload Fields – We recommend using Qualtrics instead of Gravity Forms for collecting files. There have been incidents where sensitive data (such as personal or confidential information) was inadvertently uploaded through web forms. If you must use file upload fields in Gravity Forms:
- Restrict to safe file types such as .pdf, .jpg, or .png.
- Block unsafe file types such as .exe or .zip.
- Set the maximum file size to under 5 MB.
- Never request or accept sensitive data (e.g., personal identifiers, financial, or medical information).
- Export Data Before the 90-Day Retention Limit – All form entries and uploaded files are automatically deleted after 90 days under UNC’s Gravity Forms Retention Policy.
- Restrict Access to UNC Users (If Applicable) – If your form is intended for internal use, consider requiring Onyen authentication to limit access to UNC users only. Contact the SOM Web Team for assistance enabling this feature.
- Review the Spam Tab in Gravity Forms – Occasionally, legitimate submissions may be incorrectly flagged as spam.
- Monitor Your Outlook Inbox – Occasionally, valid form submissions may be routed to your Junk or Spam folder in Outlook.
Accessing Gravity Forms
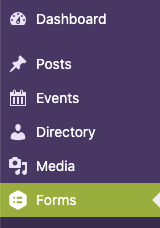
To access these forms, select Forms in the Dashboard.
Why Forms May Not Display in the Dashboard
- You do not have sufficient permissions to create and edit forms. Only users with the Administrator role can manage forms.
- The plugin may have been deactivated. To activate the plugin:
- In your site’s Dashboard, click on Plugins. You must have the Administrator role to manage plugins.
- Find the Gravity Forms plugin and click on the Activate link below the plugin name.
Email Notifications
When setting up the form notifications, there is no need to fill in the From Email field. Due to a compatibility requirement for the UNC mail system, the no-reply@mail.unc.edu will automatically be used. Anything added to the From Email field will be overwritten. To control where replies go, you can use the Reply-to field.

How To
Refer to the official Gravity Forms documentation or Gravity Forms Video Tutorials for form creation and configuration guidance. Use the links below to learn how to complete the most common form-building tasks.
Note: the SOM web system uses the Classic Editor, not the Block Editor.
Form Basics
- Creating a Form – learn how to create a new form (video tutorial also available).
- Adding Form Fields – explore the different field types available for your form.
- Conditional Logic – build interactive forms that show or hide fields based on user selections. (video tutorial also available).
- Embedding a Form in a Page or Post – display your completed form on the desired web page.
Notifications & Confirmations
- Setting Up Form Notifications – notifications allow you (and others) to receive automatic emails after someone submits a form. You can configure notifications to send to specific people or the form submitter. (video tutorial also available).
- Creating Confirmation Messages – a confirmation is the response shown immediately after a form submission. You can display a thank you message or redirect users to another page after submission. (video tutorial also available)
Entries & Data Management
- View All Forms – manage and organize your existing forms.
- View Form Entries – view form submissions, which Gravity Forms calls entries.
- Exporting Form Entries