Social Media Menu
Learn how to add a social media menu to your site’s footer. To do this, you will first need to create a menu of links (to all your social media sites) then add it to your site’s footer.
Create the Menu
In the dashboard, go to Appearance » Menus.
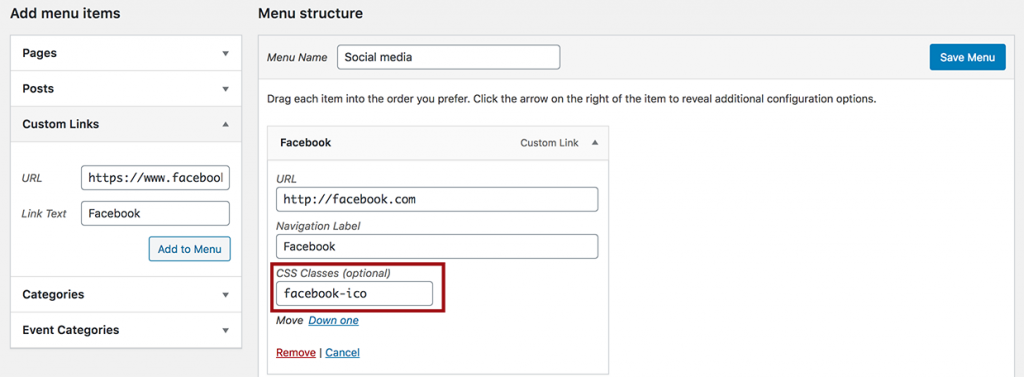
Create a new menu, and title it something like “Social Media.”
Next, expand the Custom Links field and add a link and title for one of your social media site. Click the Add to Menu button. The menu item will show up under “Menu Structure.”
In the CSS Classes field, add one of the classes listed below:
- facebook-ico – for Facebook
- linkedin-ico – for Linkedin
- twitter-ico – for Twitter
- instagram-ico – for Instagram
- snapchat-ico – for Snapchat
- youtube-ico – for YouTube
- vimeo-ico – for Vimeo
- rss-ico – for RSS Feeds
If you do not see the “Custom CSS” field in the menu item, scroll to the top of the page, in the upper right-hand corner, click on the Screen Options tab. Add a check to the “CSS Classes” box.
Add the Menu to Your Site Footer
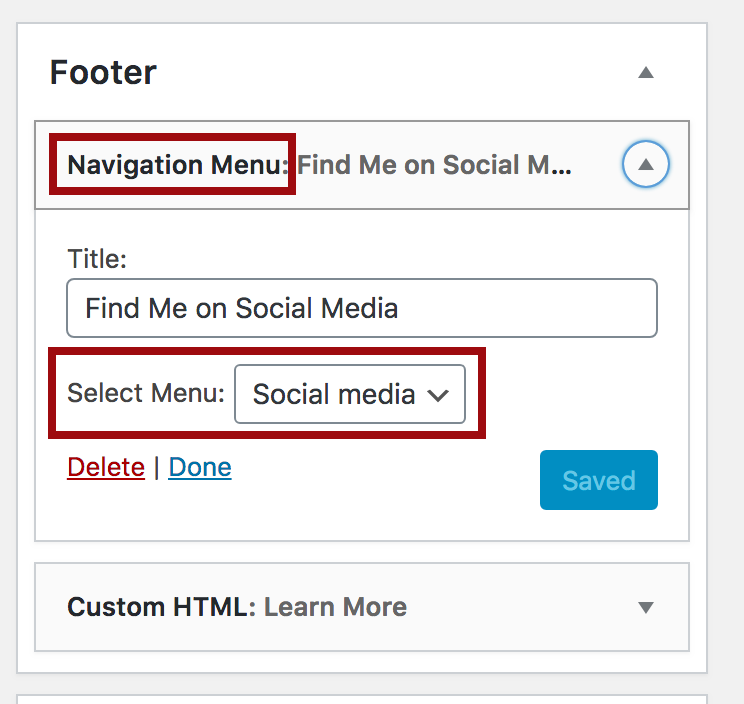
Once you have created your social media menu, go to Appearance >> Widgets.
Select the Navigation Menu under Available Widgets, and drag it to the Footer widget area. In the Navigation menu, select your social media menu from the list. Click save.


