Social Media Menu
A Social Media Menu displays linked social media icons in a widget area, most commonly in the site footer. This is useful when your department, center, or program has official social media accounts that should be available across the site.
Before adding social media links, make sure the accounts are official, active, and appropriate for your School of Medicine website.

Create a Social Media Menu
- In the Dashboard, go to Appearance → Menus.
- Select the create a new menu link.
- Give the menu a clear name, such as Social Media.
- Click Create Menu.

Add Social Media Links
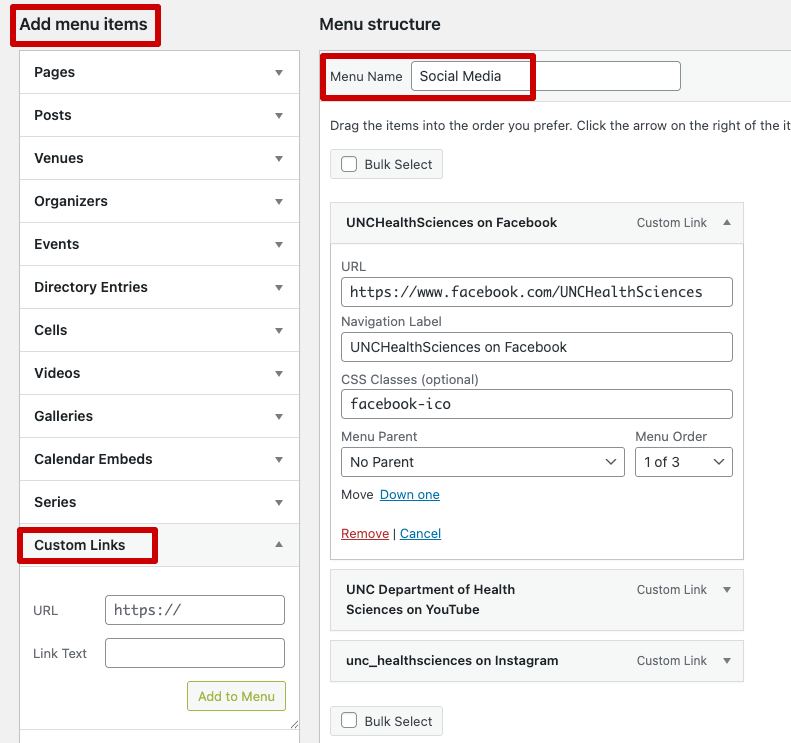
Social media links are added to the menu as Custom Links.
- In the Add menu items panel, expand the Custom Links section.
- In the URL field, enter the web address for the social media account.
- In the Link Text field, enter the name of the platform, such as Facebook, Instagram, or YouTube.
- Click Add to Menu.
- Repeat these steps for each social media account you wish to include.
Switch the Link Text To An Icon
By default, the social media links will display as text links. To display a social media icon instead of text, a CSS class must be added to each menu item.
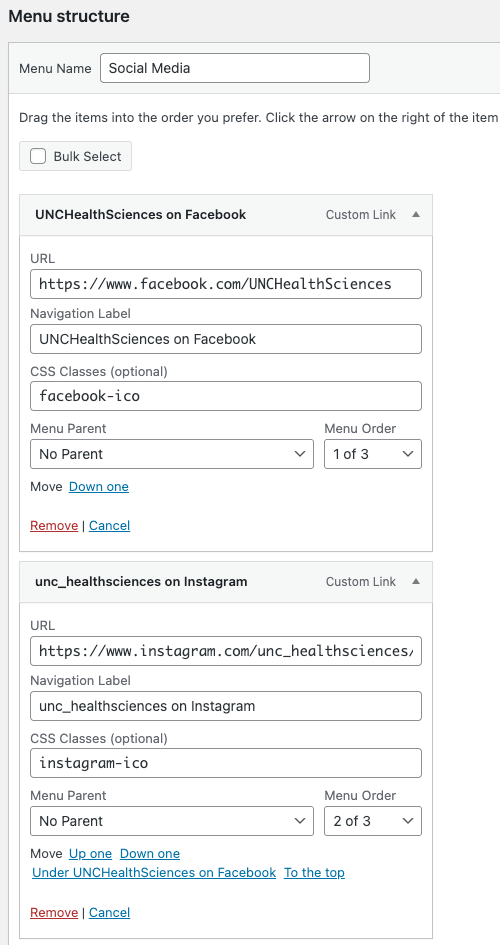
Click to expand one of the custom links and enter the corresponding class in the CSS Classes field.
Below is a list of available social media icon classes:
- facebook-ico – for Facebook
- linkedin-ico – for Linkedin
- twitter-ico – for Twitter
- instagram-ico – for Instagram
- snapchat-ico – for Snapchat
- youtube-ico – for YouTube
- vimeo-ico – for Vimeo
- rss-ico – for RSS Feeds
If you do not see the CSS Classes field:
- Scroll to the top of the Menus screen.
- Click on the Screen Options tab in the upper-right corner to expand the available settings
- Check the box for CSS Classes.

Save the Menu
After all social media links and CSS classes have been added, click Save Menu.
Add the Social Media Menu to the Site Footer
If you followed the steps above, you have successfully created a social media menu, but it will not display anywhere on your site by default. To display the menu in your site footer, follow the steps below:
- In the Dashboard, go to Appearance → Widgets.
- Locate the Footer widget area.
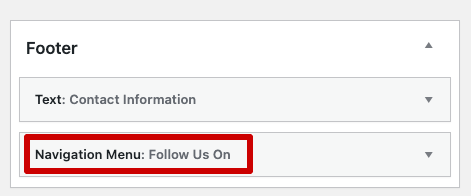
- Add a Navigation Menu widget to the footer.
- In the widget settings, select your Social Media menu.
- Add a title if desired, such as Follow Us or Connect With Us.
- Click Save.
After saving your changes, view the public site and confirm that the social media icons display correctly and link to the proper accounts.